

What are tags?
Tags are keywords you attach to meetings to keep your notes organised. They are fully customisable so you can build a system around projects, clients, teams, or anything else you care about. A meeting can have multiple tags, and you can share tags with teammates so the right people see the right meetings.When you’d use tags
Project tracking
Group every meeting related to a project in one place so you can pull up the whole history in two clicks.
Clients and accounts
Tag every call with a client so all discovery, kickoff, and review meetings live together.
Teams and departments
Use tags to separate engineering, sales, and operations meetings without spinning up new workspaces.
Themes and jobs to be done
Track recurring topics such as hiring, planning, or retros across the whole organisation.
How to use
- Creating a tag
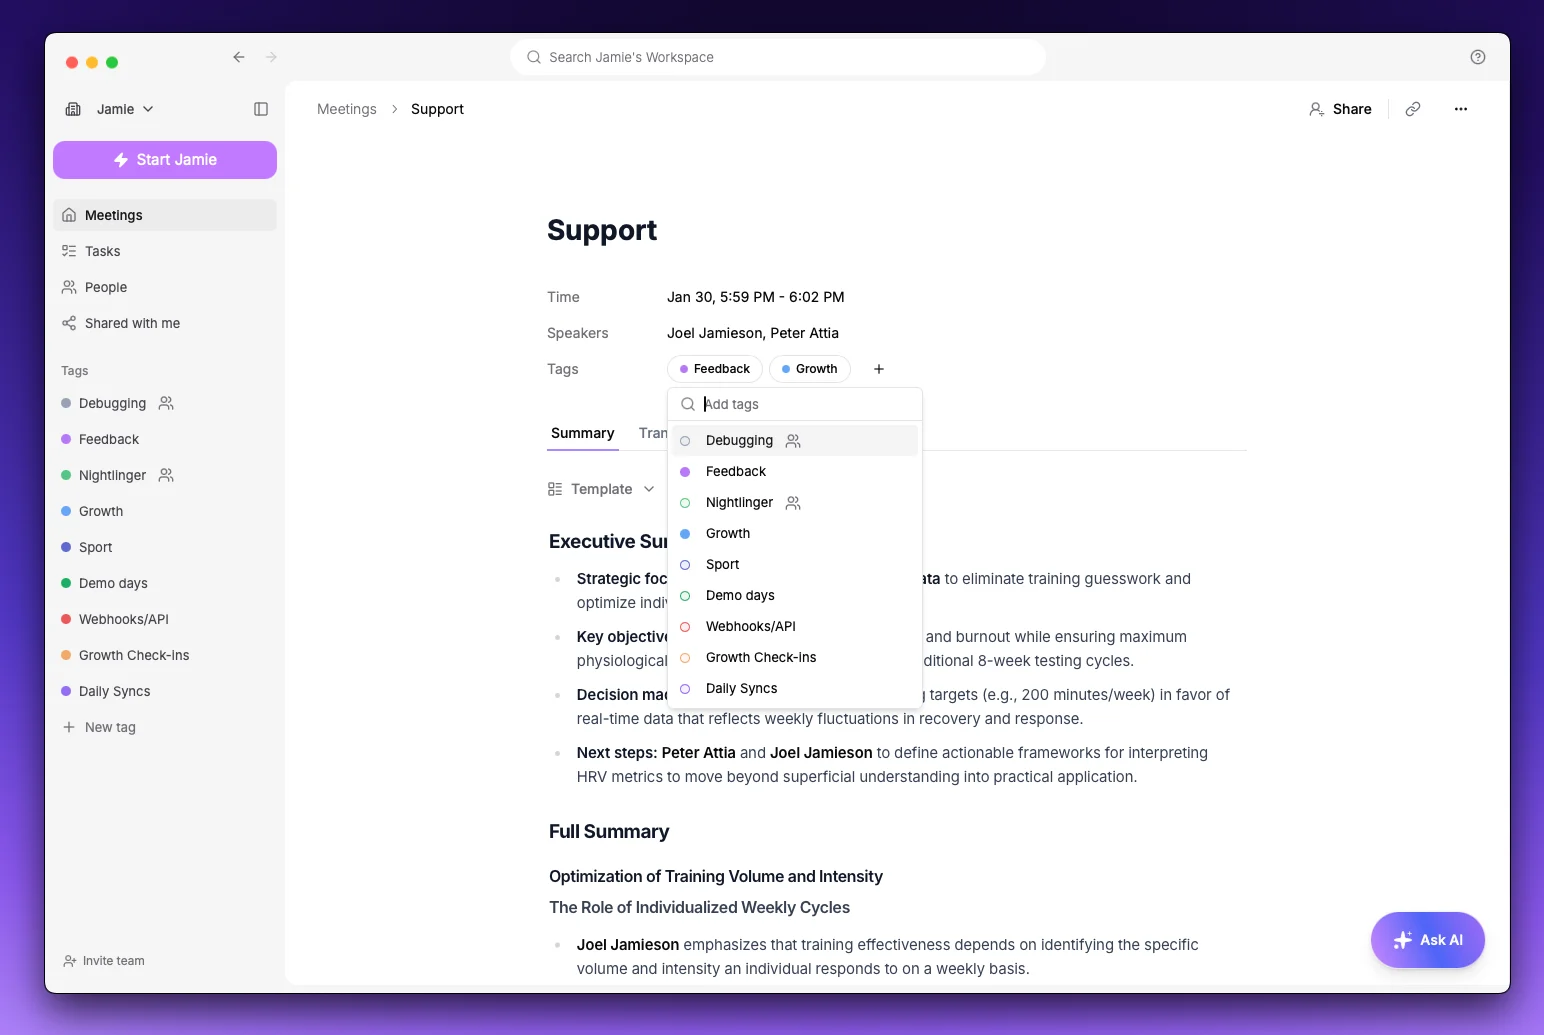
- Adding a tag to a meeting
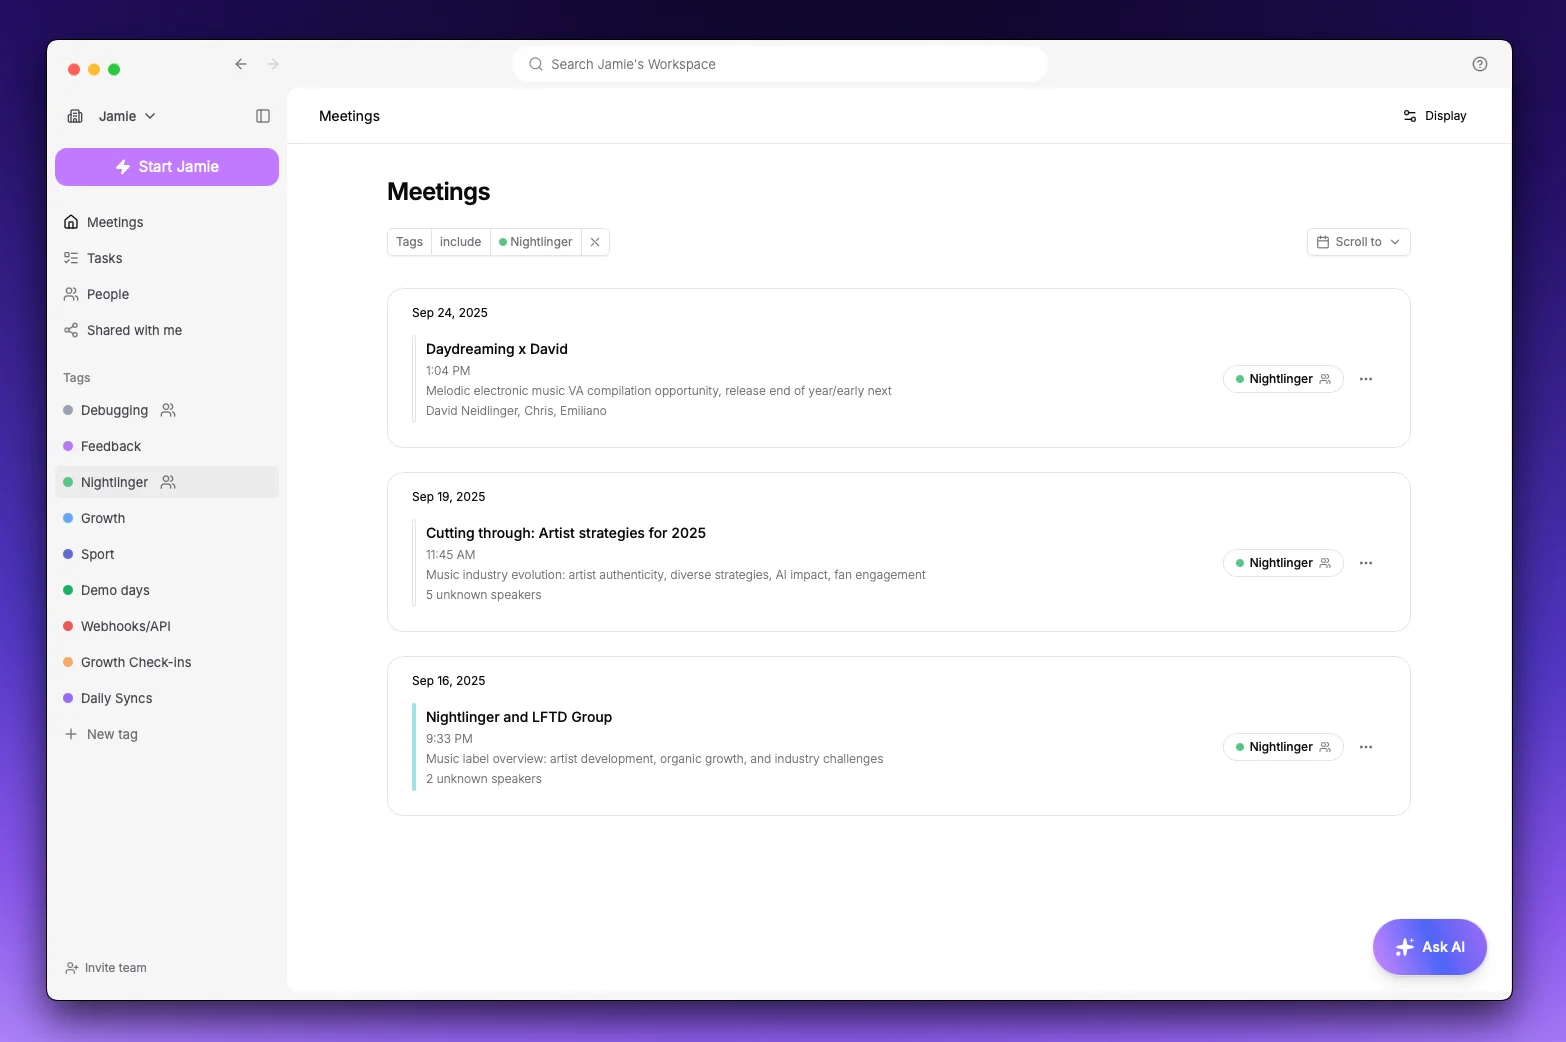
- Filtering by tag
1
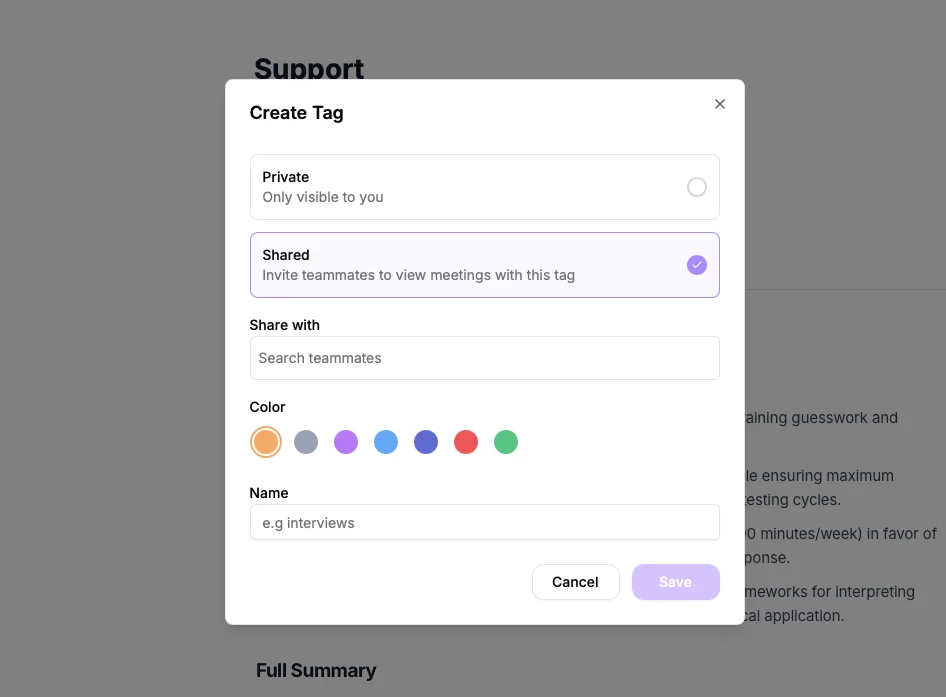
Open the new tag dialog
In the left sidebar, click + New tag.
2
Choose private or shared
Pick Private if the tag is just for you, or Shared to invite teammates. Shared tags are available on Team and Enterprise plans.
3
Pick a colour and name
Choose a colour that helps you spot the tag in the sidebar, then enter a short, descriptive name.
4
Invite contributors (shared only)
For shared tags, select the teammates who should be able to add their own meetings to the tag.
Private vs shared tags
Private tags are only visible to you. They are great for personal organisation when you do not want to involve teammates. Shared tags let you share a curated slice of your meeting library without giving teammates access to everything. When you add a meeting to a shared tag, every contributor of that tag can view that meeting. Shared tags are marked with a small users icon throughout the app.Shared tags are available on the Team and Enterprise plans.
How shared tags work
- As the owner: you create the tag and choose which teammates can contribute. Only the owner can add or remove members.
- As a contributor: you can view every meeting in the tag and add your own meetings to it.
Managing shared tag members
1
Open the tag menu
In the sidebar, click the three dots next to the shared tag.
2
Open Edit or Share
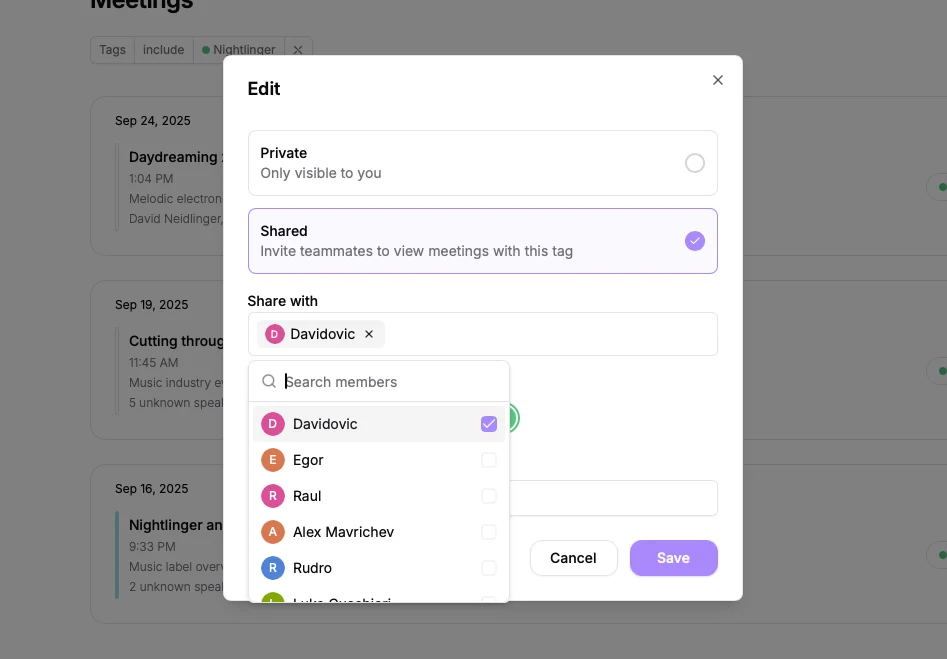
Choose Edit or Share to open the sharing settings.
3
Add or remove teammates
Update the list of contributors. Removing all contributors turns the tag back into a private tag.
Leaving a shared tag
If you are a contributor and no longer want access to a shared tag, open its menu in the sidebar and select Remove. The tag and its meetings will no longer appear for you.Tag suggestions
Jamie looks at each new meeting and suggests the tags that fit. By default, suggested tags show up next to the meeting and only apply if you accept them. If you’d rather not review them one by one, you can let Jamie apply them automatically.Turning suggestions on or off
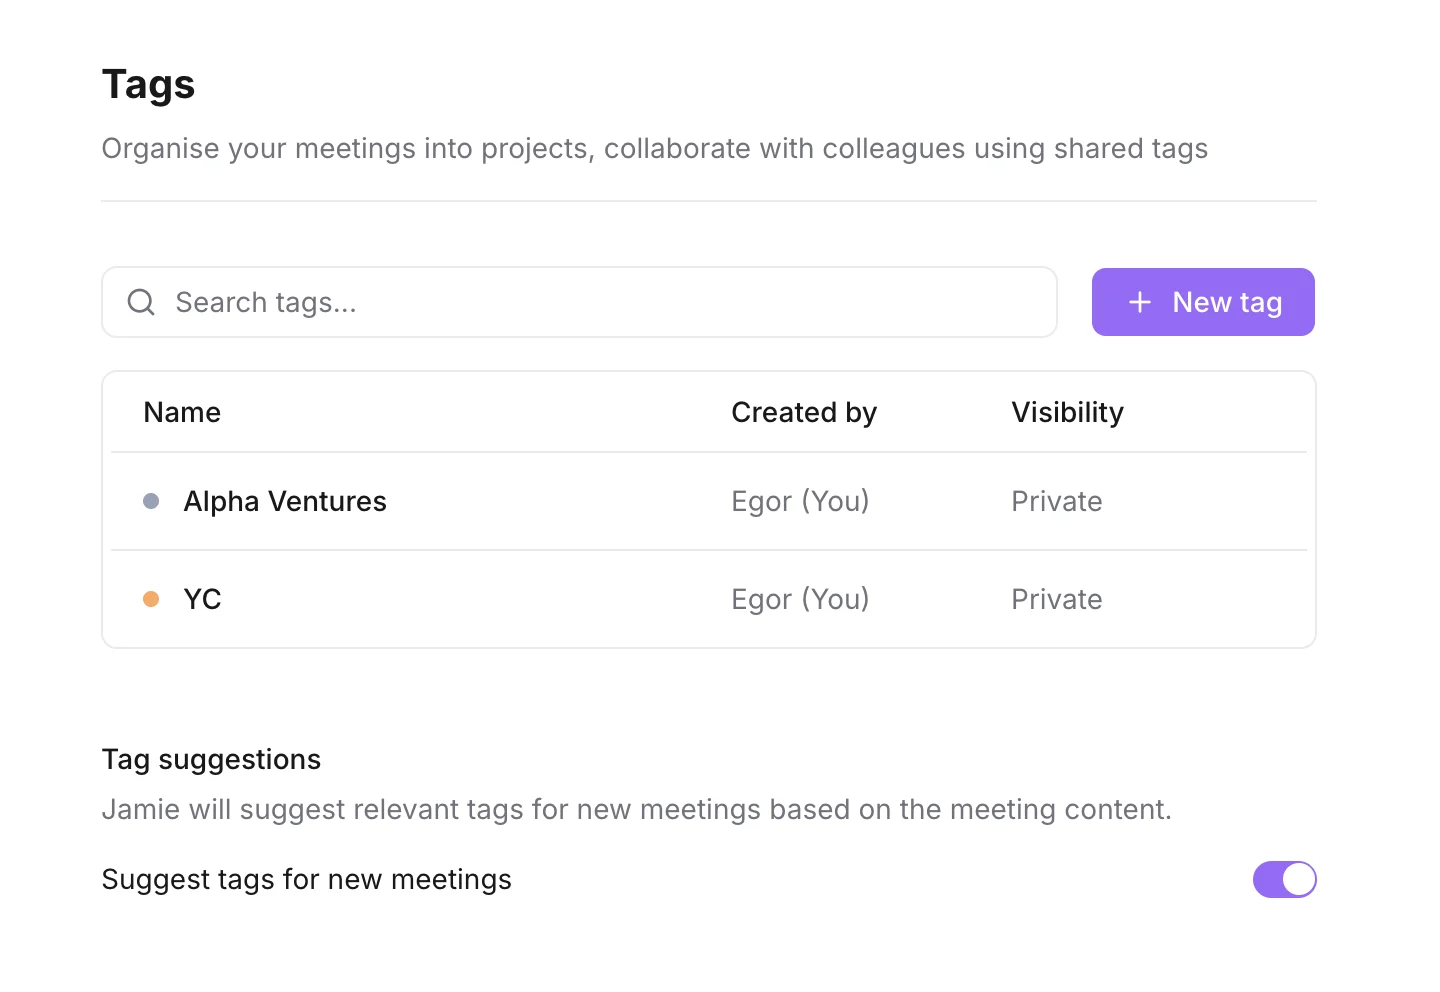
1
Open Settings
Go to Settings → Tags.
2
Find Tag suggestions
Scroll to the Tag suggestions section below the tags table.
3
Toggle the switch
Use the Suggest tags for new meetings toggle to turn suggestions on or off. The change applies to all of your future meetings.
Jamie only suggests tags you have already created. It will not create new tags for you.
Applying tags automatically
If you find yourself accepting most suggestions anyway, you can let Jamie apply them for you. With automatic application turned on, suggested tags are added to new meetings straight away — there’s no review step. You can still remove any tag that doesn’t fit. Automatic application is off by default: out of the box Jamie only ever suggests tags. After you’ve accepted a few suggestions, Jamie will offer to turn it on for you with a one-tap toast.Choosing which tags get applied
When you enable automatic application you decide how far it goes:- Private tags only (default) — Jamie automatically applies only your personal tags. Shared tags are still suggested for you to review, so you stay in control of what your teammates see.
- Private and shared tags — Jamie also applies the tags you share with teammates. Keep in mind that adding a meeting to a shared tag makes it visible to everyone who contributes to that tag.
1
Open Settings → Tags
Go to Settings → Tags and find the Tag suggestions section.
2
Turn on automatic application
Enable Apply suggested tags automatically. (Tag suggestions need to be on first.)
3
Pick the scope
Choose Private tags only or Private and shared tags. New meetings are tagged automatically from now on.
Tips and common questions
Can I rename or recolour a tag later?
Can I rename or recolour a tag later?
Yes. Open the tag menu in the sidebar and pick Edit. Renaming a tag updates it everywhere it has been applied — you never need to re-tag old meetings.
What happens to a tag when I delete it?
What happens to a tag when I delete it?
The tag is removed from every meeting that had it. The meetings themselves stay untouched. If the tag was shared, contributors lose access at the same time.
Why am I not seeing any tag suggestions?
Why am I not seeing any tag suggestions?
Two common reasons: you have not created any tags yet, or suggestions are turned off in Settings → Tags. Suggestions also need a few existing tagged meetings to learn from.
Limits and things to keep in mind
- Suggestions usually appear within a few seconds of a meeting finishing.
- Removing every contributor from a shared tag turns it back into a private tag.
- Filtering and search can be combined — filter to a tag and then search within it for a specific keyword.
- Suggestions only consider tags that already exist on your account; Jamie will never create a new tag for you automatically.